BLOG

Samyang’s 14/2.4 XP

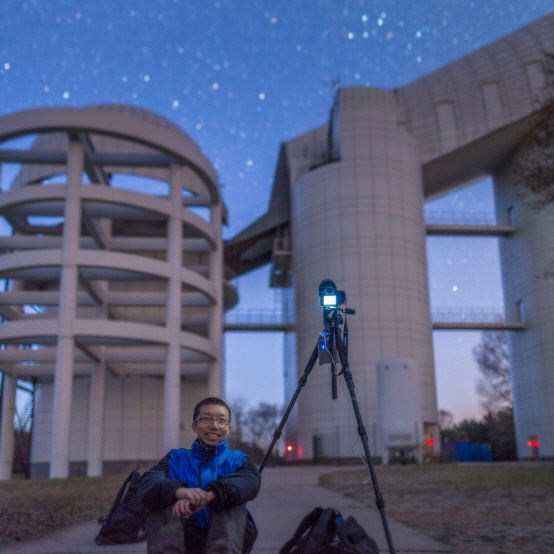
Haitong Yu

Photographer from China


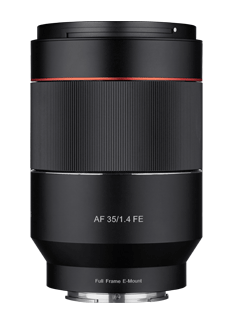
Samyang FE35/1.4AF: an ultra-versatile performer


When Samyang announced the 35/1.4 AF for Sony FE, I became immediately interested. Not only because of the convenience of autofocus, but also because I have very high expectation for its usage in astronomy photography.

This might come quite unexpected. Most people might think that astrophotography relies mostly on fast, wide-angle lenses (for night sky pictures with landscapes) or telescopes (for deep sky pictures), and that a fast 35mm lens is best suited for environmental portrait and culture shot.

Personally, however, I found that the viewpoint of 35mm offers a great balance between the details of the Milky Way and the environmental surroundings for astro-landscape pictures, and that its large aperture enables unmatched low-light image quality among wide angle lenses.


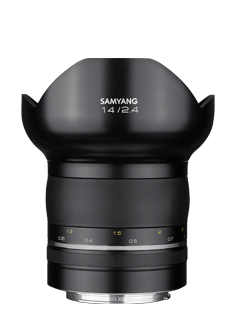
Sony A7M3, Samyang XP 14/2.4, ISO800, F2.4, 30s


Sony A7M3, 35/1.4AF, ISO800, F1.4, 10s, multi-frame stacking


Above is a comparison of the milky way, shot with an ultra-wide lens (Samyang 14/2.4 XP) and the 35/1.4 AF. It can be seen that in the 35mm shot, the milky way shows visibly better detail (colors and veins) while the whole picture has lower noise. Also I feel that the center of the milky way, one of the most photographed section of night sky, takes a perfect portion in the 35mm picture. Of course, an even longer lens – 50mm or 85mm – might be capable of showing even finer details, but their long focal length means you have to shorten the exposure time to less than 10s or otherwise the stars will start to blur. I am more comfortable to use the longer lenses on an equatorial mount which cancels the rotation of the earth to enable longer exposure.


Sony A7M3, 35/1.4AF, ISO800, F1.4, 10s, multi-frame stacking


Apart from the absolutely brightness, another reason I prefer 35mm lenses to wider primes is that they often correct image aberrations more brilliantly. Image aberrations are the optical imperfections in lens design that makes image blurry and the stars not pinpoint any more in the resulting pictures. They can be particularly annoying in astrophotography, because you are most likely to use the fastest aperture and focus to infinity. In this scenario, the stars at the image corners will have strange shapes in a lens with aberrations like coma and astigmatism. Unpleasant colors will also appear around the brighter stars and at the edge of the image due to chromatic aberrations.


 ;

An example of lens aberration wide-open. The 100% crop at upper-right corner shows the strange shape and colors of the stars.


The FE35/1.4AF, albeit being a very fast lens, shows very little aberration in this regard. Below is an example, where I deliberately filled the whole image with stars and shot the lens wide-open to see its performance.


Full image. Sony A7R2, Samyang 35/1.4AF, F1.4, 8s, ISO1600


Here’s a 100% crop at the image center (without any correction of chromatic aberration):


And a 100% crop at the upper-left corner:


It can be seen that in the image center, the brighter stars boomed out a little due to slight spherical aberration. Yet at the extreme corner, only the brightest stars showed trace of deformation. This is exceptional performance to me, considering these are 100% crops on a 42 megapixel sensor, which puts ultra-high demand on today’s lenses. Chromatic aberrations are not corrected as nicely, as you can see some stars have colorful fringes. I suggest some fine tune using the “defringe” function in Adobe Camera RAW to get rid of them quite easily.

As a side note, personally I like the lens’s reproduction of brighter stars with some “blooming” effect, because it helps to differentiate the brighter stars from the dimmer ones. This behavior is very similar to the naked eye, which helps to show the bright constellations, such as the famous Big Dipper (on the right of the image):


Wind turbine blowing towards the Big Dippers.


Another great way to use the 35mm lens for astrophotography is making panoramas. Not only does stitching a panorama image with multiple shots help to widen the field of view, it also has greatly improved details and lower noises when comparing to a single shot with a wider lens.


This image is made by 4 vertical images shot from right to left. The stitching is done with Adobe Camera RAW. You can also use more professional panorama tools such as PTGui.


Winter milky way over snow-covered hills. This vertical panorama is made with 3 images shot in horizontal (landscape) orientation.


As a final remark, I found the 35/1.4AF is an excellent and greatly versatile lens. Its superb resolution let me handle the themes like astronomy and landscape at ease. The addition of autofocus is silent and fast with the cameras I put it on (Sony A9, Sony A7R3, Sony A7M3), which means I can capture motion, street scenes and portrait with great freedom. I am very happy to have this lens in my camera bag.


Some more sample images with the 35/1.4 AF.


A pathway to the Jupiter. Sony A7M3, 35/1.4, F1.4, ISO640, 13s, brightened in post


Milky way before morning blur hour. Sony A7M3, 35/1.4, F1.4, ISO640, 10s, brightened in post


The national flag honor guard marching at dawn. Sony A9, 35/1.4, F1.4, ISO1600, 1/50s


Foggy terrace in early spring. Sony A7R3, 35/1.4, F5.6, ISO100, 1/125s


Girl in the field of flowers. Sony A7R3, 35/1.4, F1.4, ISO100, 1/2000s


 ;
Newsletter Feedback Shop
Now

三洋で提案する最適の標準画角について調べましょう。

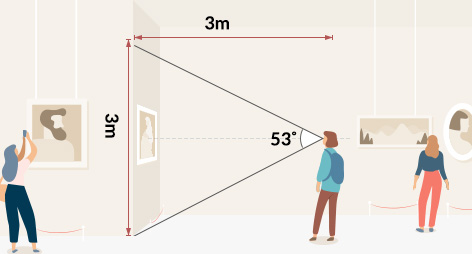
人間との関係、そして美しい空間演出のために小道具を飾る際にも適切な間隙や距離は、必ず要ります。ならば、絵及び写真の作品を正しく鑑賞するために我々は、どれだけの距離をおいて見るのがベスト?

正解は、「作品フレームの対角線の長さ」程度の距離です。

표준화각 자료 이미지
표준화각 자료 이미지

作品の全体を十分視野に入れて鑑賞するためには、作品の対角線の長さほど距離をおいて鑑賞した方がいいです。あまり近い距離で作品を見れば人間の目が集中できる視野角である50度より広がって絵をそのまま鑑賞できなくなってしまいます。 最適の鑑賞、最適の視線のために必要な理想的距離は、写真術にも適用します。 停止画像を撮る写真術では撮像面の対角線の長さと同じく焦点距離のレンズを標準レンズと定義します。

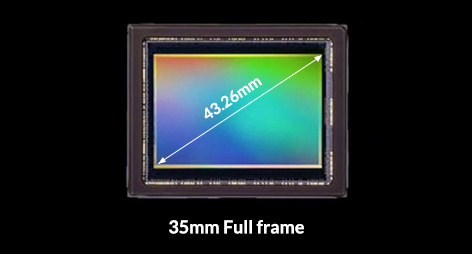
最適の鑑賞、最適の視線のために必要な理想的距離は、写真術にも適用します。 停止画像を撮る写真術では撮像面の対角線の長さと同じく焦点距離のレンズを標準レンズと定義します。デジタルカメラのフルフレームセンサーの大きさは、36x24mmであり、その対角線の長さは、約43.26mmであるため、標準レンズは、何mmにしたらいいのかについての最善の答は、「43.26mmに類似した値」といい、現在まで標準レンズの代名詞と見なされる「50mm」とは、いいきれません。

過去には、フィルムの対角線の長さに似た45mm画角のレンズがありふれましたが、SLR カメラの大成功によってミラーが入る空間を確保するために50mmレンズが標準とされていましたが、最近 ミラーレス一カメラのすそが大きく拡大しながらフランジバックの短いミラーレス一カメラの特性を考慮してより正確に標準レンズの画角を45mm
と再判断すべきではないのかの問題意識からAF 45mm F1.8 FEに対する開発は、始まりました。 サムヤンのAF 45mm F1.8 FEは、35mm画角レンズより最も最小した歪み、55mm画角よりは、一層広いイメージが撮影できて人物、景色、建築物、ペットなど多様なテーマの撮影で結果に満足していただけます。

プリセット絞り機能とは

プリセット絞り機能を使えば、絞りが「絞りクリック解除(De-click)レンズ」のようにスムーズに動作するため、より自然な動画を撮影できます

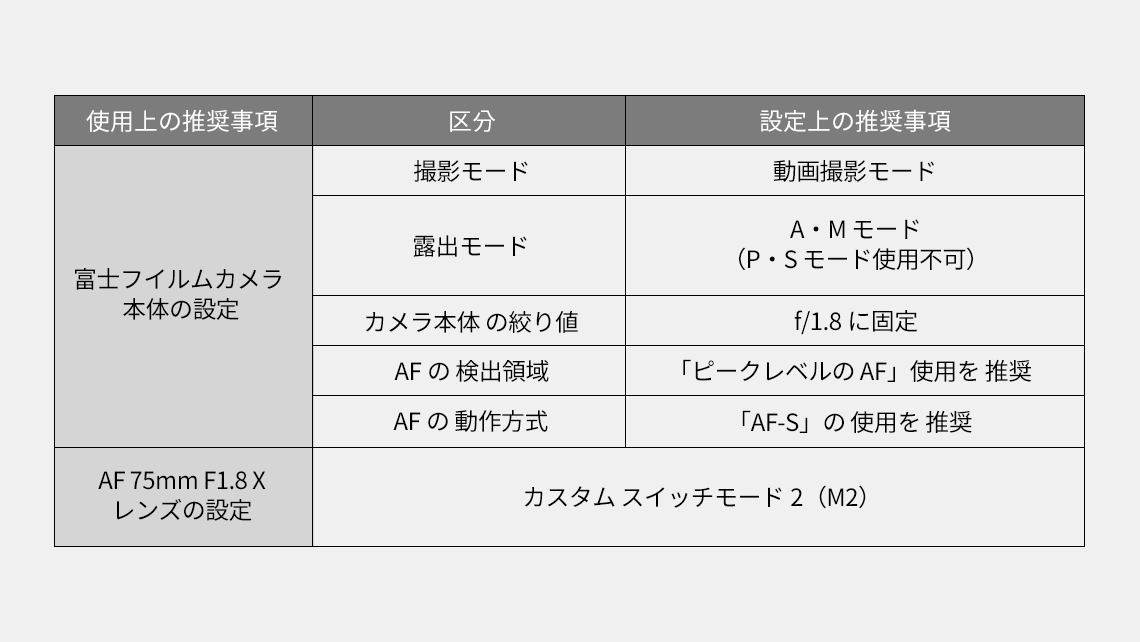
富士フイルムカメラは、最低の絞り値(Fストップ)に合わせて絞りが制御されるように設計されています。カメラで絞りを制御すると、設定表示が点滅して瞬時に適切な絞り値になりますAF 75mm F1.8 Xは、「プリセット絞り機能」がカメラ本体に意図的に絞り値を伝達しないため、点滅表示なく滑らかに適切な絞り値を調整できます。絞りを制御することで変化した露出に合わせてISO感度とシャッタースピードを調節するので、各ストップ値の中間値でも露出を調整できるからです。

【プリセット絞り機能の使用上の推奨事項とは】

プリセット絞り機能は、動画撮影モードでのみ動作します。
f/1.8の絞りを最大に開き、AモートとMモードで使用することをお勧めします。「プリセット絞り機能」の使用条件は、上記の表をご参照ください。

* プリセット絞り機能の使い方

1) カメラ本体の設定
      AFモード → 動画撮影モード(「A」または「M」モード)→ 絞り値をf/1.8に固定
(2) AF 75mm F1.8 Xレンズの設定
      カスタムスイッチをモード2(M2)にスイッチ
(3) フォーカスリングでプリセット絞りを調整

【プリセット絞り機能の使用上の推奨事項とは】

プリセット絞り機能は、動画撮影モードでのみ動作します。
f/1.8の絞りを最大に開き、AモートとMモードで使用することをお勧めします。「プリセット絞り機能」の使用条件は、上記の表をご参照ください。

* プリセット絞り機能の使い方

1) カメラ本体の設定
      AFモード → 動画撮影モード(「A」または「M」モード)→ 絞り値をf/1.8に固定
(2) AF 75mm F1.8 Xレンズの設定
      カスタムスイッチをモード2(M2)にスイッチ
(3) フォーカスリングでプリセット絞りを調整

[Dolly Shotとは?簡単な撮影方法はこちらで!]

【Dolly Shot とは?】

一般的にカメラをキャスター付きのカート(ドリー)やモータ搭載のカメラクレーンなどで移動させ、被写体との距離を調節しながら撮影する方法です。この方法で感覚的な効果とドラマチックな効果を最大化し、被写体と視聴者の心理的な距離感を調整できます。

【簡単にハンドヘルドでDolly Shotを撮る方法】

Tip. 移動距離が長いとカメラが揺れることがありますので、焦点距離35~100mmの間で撮影してください。
1. 被写体と約1.5~2m 程度の距離に立ちます。
2. カスタムスイッチをMFとMode3に設定した後、画角は約100mmに設定します。
3. フォーカスリングを調節して被写体に焦点を合わした後、 絞りはF8~16に設定します。
4. 上体と腕を動かしてカメラを被写体側に近づけながらズームリングを左(広角側)にゆっくり回します。
5. Dolly Shot完成です!
※ 被写体とより遠い距離で撮影するときにはドリーやジンバルなどを活用するとより安定した撮影ができます。

DSLR / Full Frame
1D X Mark Ⅱ
1D X
1Ds Mark Ⅲ
1Ds
5DsR
5Ds
5D Mark Ⅳ
5D Mark Ⅲ
6D Mark Ⅱ
6D
DSLR / APS-H
1D Mark Ⅲ
1D
Mirrorless / APS-C
M6
M5
M10
M3
M2
DSLR / APS-S
7D Mark Ⅱ
7D
80D
70D
60D
30D
D60
D30
77D (9000D)
760D (8000D / Rebel T6s)
1300D (Kiss X80 / Rebel T6)
1200D (Kiss X70 / Rebel T5)
200D (Kiss X9 / Rebel SL2)
800D (Kiss X9i / Rebel T7i)
700D (Kiss X9i / Rebel T7i)
100D (Kiss X7 / Rebel SL1)
650D (Kiss X6i / Rebel T4i)
600D (Kiss X5 / Rebel T3i)
550D (Kiss X4 / Rebel T2i)
500D (Kiss X3 / Rebel T1i)
1000D (Kiss F / Rebel XS)
450D (Kiss X2 / Rebel X냐)
DSLR / Full Frame
D850
D5
D810A
D4S
D810
D750
Df
D610
D4
D800
D800E
D600
D3s
D3x
D700
D3
DSLR / APS-C
D7500
D3400
D500
D5600
D7200
D5500
D3300
D7100
D5300
D5200
D7000
D300s
D300
DSLR / Full Frame
Z6
Z7
D810A
D4S
D750
D810A
DSLR / APS-C
D7200
D500
D3300
D5500
D5600
D3400
D7500

* Cameras released within 5 years from 2019 are tested.

パスワード変更のご案内

ホン・ギルドン様はパスワードを変更されてから 3ヶ月が経過しました。

パスワードをお忘れですか?
以下の情報をご入力ください。

認証コードを受信する

ご入力いただいた電話番号 に認証コードを送信いたします。
標準料金がかかります。

Failed

There is no ID found with that information.
Please confirm the accuracy of your information.

If you would like to create a new account, please click the below link.

Join now

IDをお忘れですか?
以下の情報をご入力ください。

以下の情報をお確かめください。

1つのIDが見つかりました。

それでもIDが見つからない場合、本人認証を通してIDをお探しください。

本人認証

失敗

申し訳ありません。一致する情報がありません。
情報が正しいかお確かめの上、もう一度お試しください。

新規アカウントを作成するなら、次のリンクをクリックしてください。

アカウント作成

Eメール送信完了

会員登録の最終段階です。 以下のEメールアドレスで
受信したリンク先に移動してください。


アカウント認証

이메일 발송 완료

고객님 메일로 임시비밀번호가 발송되었습니다.


확인

ID変更

新しいEメールアドレスをご入力ください。
Eメールアドレスを変更した後、再度ログインが必要です。

現在のEメールアドレス :
新しいEメールアドレス :
Change email address

Eメールアドレス変更
メインへ

エラーメッセージ

申し訳ありません。
誤ったアクセスによって要請が拒否されました。
ご質問があれば管理者までお問い合わせください。

メインへ

Eメール認証をする

お客様、こんにちは。
お客様はhongildong@naver.comを
森養オプティクスのIDとして登録されました。
認証ボタンをクリックすると、森養オプティクスの認証が完了します。

アカウント認証

森養オプティクスのアカウントに登録した覚えがありませんか?
他のユーザーがEメールアドレスを誤って入力した可能性もあります。
森養オプティクスのアカウントに登録した覚えがないなら、
下のメール誤用通報のリンクをクリックしてください。

- Eメール保護を希望します。 -

参考 : 本メールは送信専用ですので返信はできません。
ご不明な点がございましたら、次のウェブサイトまでお問い合わせください。 ウェブサイトはこちらから >

Eメール保護

次のアカウントがお客様のEメールを使って登録されています。
このアカウントの使用を中止されるなら、
下の「アカウントを遮断する」ボタンをクリックしてください。

hongildong@naver.com

アカウントを遮断する

Account authentication

Congratulations!
Your account has been verified.
Meet the various services of Samyang Optics!

Sign in
Go main

IDを探す

一致する会員情報がありません。

找回ID

ID確認

お探しのIDは bebe***と確認されました。

确认

ID確認

ご入力いただいた情報と一致する情報がありません。
もう一度お確かめください。

确认

パスワードを探す

パスワードを再設定するためのEメールが
ユーザーのアカウントに転送されました。

hongildong@naver.com

受信したEメールをお確かめの上、
案内に従ってパスワードを再設定してください。
万一メールを受信できない場合には、
迷惑メールフォルダをお確かめください。

确认

Eメールが見つかりませんか?

認証メール再送信

パスワードを探す

ご入力いただいた情報と一致する情報がありません。
もう一度お確かめください。

确认
USB Driver DOWNLOAD
ⓒDaniel Gangur

Sign Up for
Samyang Newsletter

Be the first to know about new product
announcement, global events and news!

By subscribing, you agree to the terms and conditions of use of the site and the use of personal information. Newsletter will be sent until unsubscribed.
Don't show this popup today

Samyang Optics,
with 50 years of history,
begins a new journey as
LK SAMYANG

Don't show this popup today
WE HAVE MOVED!

NEWSLETTER

Subscribe to our newsletter to receive new product alerts
and inspiring contents created with Samyang lens

Do not open this window for today
/upload/magazine/pro/1588686620(0).jpg